Cline 源码浅析 - MCP 调用

上一篇文章Cline 源码浅析 - 从输入到输出,从源码角度浏览了一下 Cline 处理用户输入到最后输出的过程,本文看一下其中关于 MCP 的处理。

关于 MCP,可以查看官方文档
Cline MCP
如何配置 MCP Server
我们打开 Cline 的 MCP 界面,可以看到 Cline 提供了多种配置 MCP 的方式:
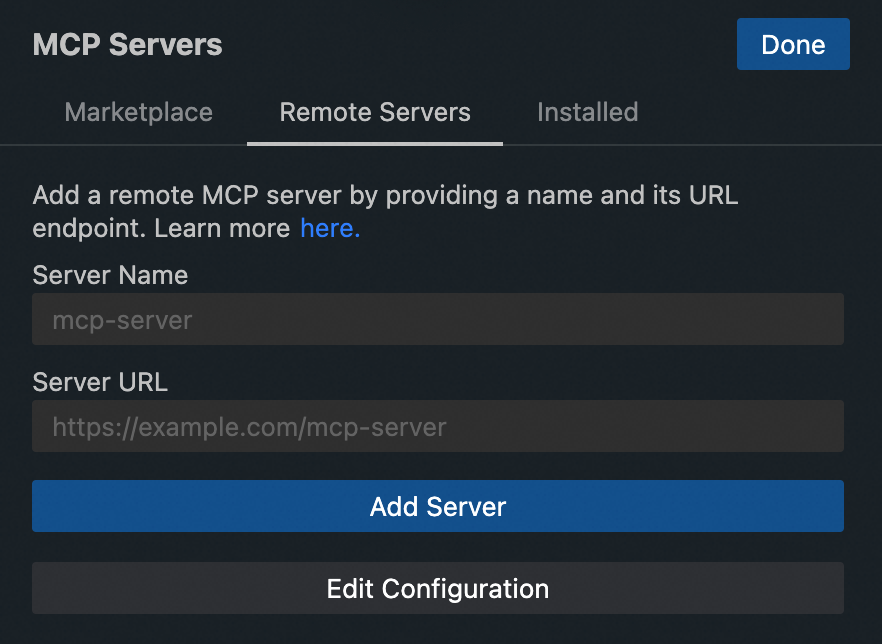
本质上都是将 MCP 配置写入设置目录下的 cline_mcp_settings.json 文件,这里我们配置一个根据姓名查询工号的 MCP Server。
{
  "mcpServers": {
    "name2empid": {
      "autoApprove": [],
      "disabled": false,
      "timeout": 60,
      "url": "https://xxxx.com/xxx/sse",
      "type": "sse"
    }
}
另外 Cline 自行维护了一个 MCP 市场,用户可以从中选择安装,Cline 提供了一个比较有意思的安装方式,当你点击 Install 的时候,他并不是简单的把配置写入配置文件,而是通过大模型来进行安装(从访问文档到安装到验证),代码位于 src/core/controller/mcp/downloadMcp.ts,提示词如下:
// Create task with context from README and added guidelines for MCP server installation
const task = `Set up the MCP server from ${mcpDetails.githubUrl} while adhering to these MCP server installation rules:
- Start by loading the MCP documentation.
- Use "${mcpDetails.mcpId}" as the server name in cline_mcp_settings.json.
- Create the directory for the new MCP server before starting installation.
- Make sure you read the user's existing cline_mcp_settings.json file before editing it with this new mcp, to not overwrite any existing servers.
- Use commands aligned with the user's shell and operating system best practices.
- The following README may contain instructions that conflict with the user's OS, in which case proceed thoughtfully.
- Once installed, demonstrate the server's capabilities by using one of its tools.
Here is the project's README to help you get started:\n\n${mcpDetails.readmeContent}\n${mcpDetails.llmsInstallationContent}`
源码阅读
MCP 配置相关的代码位于:src/services/mcp/McpHub.ts,这里本质就是一个 MCP Client 初始化的逻辑,根据配置连接 Server 获取 Tool。
连接的 Server 的代码位于 connectToServer,调用 @modelcontextprotocol/sdk/client 这个包初始化 Client。
const client = new Client(
  {
    name: "Cline",
    version: this.clientVersion,
  },
  {
    capabilities: {},
  },
)

// 处理不同的类型的 Server
transport = new StdioClientTransport()
transport = new SSEClientTransport()
transport = new StreamableHTTPClientTransport()

await client.connect(transport)
然后获取 tool 和 resource:
// Initial fetch of tools and resources
connection.server.tools = await this.fetchToolsList(name)
connection.server.resources = await this.fetchResourcesList(name)
connection.server.resourceTemplates = await this.fetchResourceTemplatesList(name)
MCP Client 的工作初始化完成。
MCP 的使用
下面看一下我们配置好的 MCP Server 是如何在我们的任务中运作的。
System Prompt
上一篇文�章我们得知,System Prompt 是实时拼接的,这里把 MCP Server 相关的 Prompt 贴在这里:
const systemPrompt = `
MCP SERVERS

The Model Context Protocol (MCP) enables communication between the system and locally running MCP servers that provide additional tools and resources to extend your capabilities.

# Connected MCP Servers

When a server is connected, you can use the server's tools via the \`use_mcp_tool\` tool, and access the server's resources via the \`access_mcp_resource\` tool.

${
	mcpHub.getServers().length > 0
		? `${mcpHub
				.getServers()
				.filter((server) => server.status === "connected")
				.map((server) => {
					const tools = server.tools
						?.map((tool) => {
							const schemaStr = tool.inputSchema
								? `    Input Schema:
    ${JSON.stringify(tool.inputSchema, null, 2).split("\n").join("\n    ")}`
								: ""

							return `- ${tool.name}: ${tool.description}\n${schemaStr}`
						})
						.join("\n\n")

					const templates = server.resourceTemplates
						?.map((template) => `- ${template.uriTemplate} (${template.name}): ${template.description}`)
						.join("\n")

					const resources = server.resources
						?.map((resource) => `- ${resource.uri} (${resource.name}): ${resource.description}`)
						.join("\n")

					const config = JSON.parse(server.config)

					return (
						`## ${server.name} (\`${config.command}${config.args && Array.isArray(config.args) ? ` ${config.args.join(" ")}` : ""}\`)` +
						(tools ? `\n\n### Available Tools\n${tools}` : "") +
						(templates ? `\n\n### Resource Templates\n${templates}` : "") +
						(resources ? `\n\n### Direct Resources\n${resources}` : "")
					)
				})
				.join("\n\n")}`
		: "(No MCP servers currently connected)"
}`
MCP Server 的相关提示词在 System Prompt Tool Use Guidelines 部分,通过遍历 McpHub 内所有 server,将 server 内的 tool 格式化的拼接到 Prompt 中。大致格式为:
## name2empid(node xxx.ts)
### Available Tools
	- get_empid_by_name: 根据员工姓名查询工号
    	Input Schema: {"name": "string"}
同时还提供给模型一个调用 MCP Server Tool 的示例:
## Example 5: Requesting to use an MCP tool

<use_mcp_tool>
<server_name>weather-server</server_name>
<tool_name>get_forecast</tool_name>
<arguments>
{
  "city": "San Francisco",
  "days": 5
}
</arguments>
</use_mcp_tool>
涉及到 MCP 调用统一使用 use_mcp_tool 工具,然后再指定是哪个 MCP 工具。
模型调用
比如我们问“查询张三的工号”,模型输出类似下面这样:
<thinking>
我需要查询"张三"的工号。根据任务描述,我需要使用name2empid MCP服务器提供的工具来获取员工的工号。

我可以使用`use_mcp_tool`工具来调用name2empid服务器的`get_empid_by_name`工具,该工具可以根据员工姓名获取工号。

需要的参数是:
- server_name: "name2empid"
- tool_name: "get_empid_by_name"
- arguments: 包含员工姓名的JSON对象

我已经有了所有必要的信息,可以直接调用这个工具。
</thinking>

<use_mcp_tool>
<server_name>name2empid</server_name>
<tool_name>get_empid_by_name</tool_name>
<arguments>
{
  "name": "张三"
}
</arguments>
</use_mcp_tool>
经过 parseAssistantMessageV2 和 presentAssistantMessage 两个方法,会从模型输出中解析出使用的 MCP Tool 以及参数,和内置的 Tool 逻辑基本类似。
name = 'use_mcp_tool'
params = {server_name: 'name2empid', tool_name: 'get_empid_by_name', arguments: '{\n  "name": "张三"\n}'}
arguments = '{\n  "name": "张三"\n}'
server_name = 'name2empid'
tool_name = 'get_empid_by_name'
此时,Cline 会执行 McpHub 内的 callTool 方法获取结果,后面再将结果交给模型,得到最终输出,自此任务结束。
总结
如果觉得 Cline 源码太复杂,可以直接看 MCP 官方的 Client DEMO,比较清晰。
MCP 大大扩展了模型能力,可以在让模型发挥更好的价值。Cline 在 MCP 的管理和调用上设计的都很巧妙,尤其是 System Prompt,下一篇文章我们将探讨一下 Cline 的 Prompt 设计。
欢迎关注我的公众号:前端生存指南,一起聊聊前端、AI 和生活。